Monday, November 21, 2011

Let's Make a Tattered Rose

November 21, 2011
Tutorial for the Tattered Floral paper Rose


Supplies:
·       Tim Holtz Alterations Die Tattered Florals
·       Cardstock of about 80# weight
·       Scissors
·       Quick Dry Glue such as Scotch
·       Large Glue Dots


Instructions:
1.     Cut 3 six petal flowers from with the next to the smallest flower.
2.     Fold the flower petals into quarters.
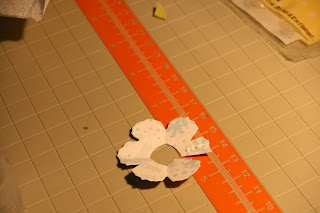
3.     Cut the point at the center of the flower in a curve to form a circular hole in the middle of the petals.  Do this to all three of the petals.
4.     Cut one of the petals to remove 1/2 of a petal, and throw the cut out away.  Cut the second on to remove
1 1/2 petals, and keep both pieces.  Cut the third petal to remove 2 1/2 petals, and keep both pieces.
5.     Starting with the 5 1/2 petal piece, run a small line of glue along the front of the 1/2 petal, and attach it to the backside of the petal to form a 5 petal flower piece.  Do this same thing to all the rest of the pieces except the one petal.  The single petal piece you just roll into a tube with one end small than the other, and this forms the center of the rose.


6.     Leave the glue dot on one of the pieces of paper that it came adhered to.  Press the 5 petal piece into the glue dot, the press the 4 petal into the glue dot in the center hole, then 3, 2,1.  Now you have a rose that you can stick anywhere that the glue dot will hold it.

You can roll the petals over a skewer, distress the edges before assembling, highlight them with pait.  All kinds of nice stuff can happen with these.


©The Copyright to this tutorial is held by Lynne Neumann.  This material may not be reproduced in full or in part without the express written permission of the author.  You may feel free to link to this tutorial.  questions@wtppro.com

No comments: